
I used a cheap and fairly commonly available Dell Laser Mouse (M-UAV-DEL8) for many years, and really liked it, as it provided all the features I wanted in more expensive mice (laser tracking, decent response, on-mouse tracking adjustment, and a scroll wheel with some buttons in places I could manage. I had two over time.
Over time the quality of the tracking started to deteriorate and the mice eventually became essentially unusable. Cleaning the lens under the mouse and applying compressed air or suction from a vacuum cleaner didn't improve the performance. I assumed that whatever cheap sensor or other electronics in the mouse were dead and I purchased a new mouse and the Dells went into the junk pile.
Years later, i wondered what was up and decided to open the mice for cleaning. It turns out that the optics sit on a wide piece of clear plastic and it catches dust and debris from the top of the mouse, but this is very difficult to remove without taking the mice apart. Cleaning the sensor brought it back to full performance. I also cleaned the scum from scroll wheel mechanism and inspected the click-switches.
Repair notes:
Disassembly:
The mouse comes apart easily. There are 2 Phillips screws under the rear skate pad. The rear pad can be removed non-destructively with knife and replaced.


After removing the screws the mouse has two circuit boards connected with thick ribbon cables. These boards are on both halves of the mouse. You can remove the top board from the mouse by moving it left and right relative to the bottom and removing the two retention screws.


The bottom circuit board has the side click buttons in the way. The buttons can be removed with a thin prying object like a knife or small screwdriver by prying the retention tabs inward and pulling up on the buttons.
After that, there are 2 screws in the bottom circuit board and the electronics and scroll wheel will just slide out.
Laser Optics/Lens:
To remove the lens from the bottom for cleaning, there are two small tabs that are melted into blobs on top of the laser sensor. Cut the tabs with a knife and the lenses will fall away. You can clean it with a paper towel and isopropanol. I noticed that you can see the dirt on the optics with the white towel behind it... this makes getting it clean easy... it took more than a few wipes to get it spotless.
I reattached the lens by putting 2 small dabs of hot glue on the outside fingers of the lens that go on the outside of the laser sensor.


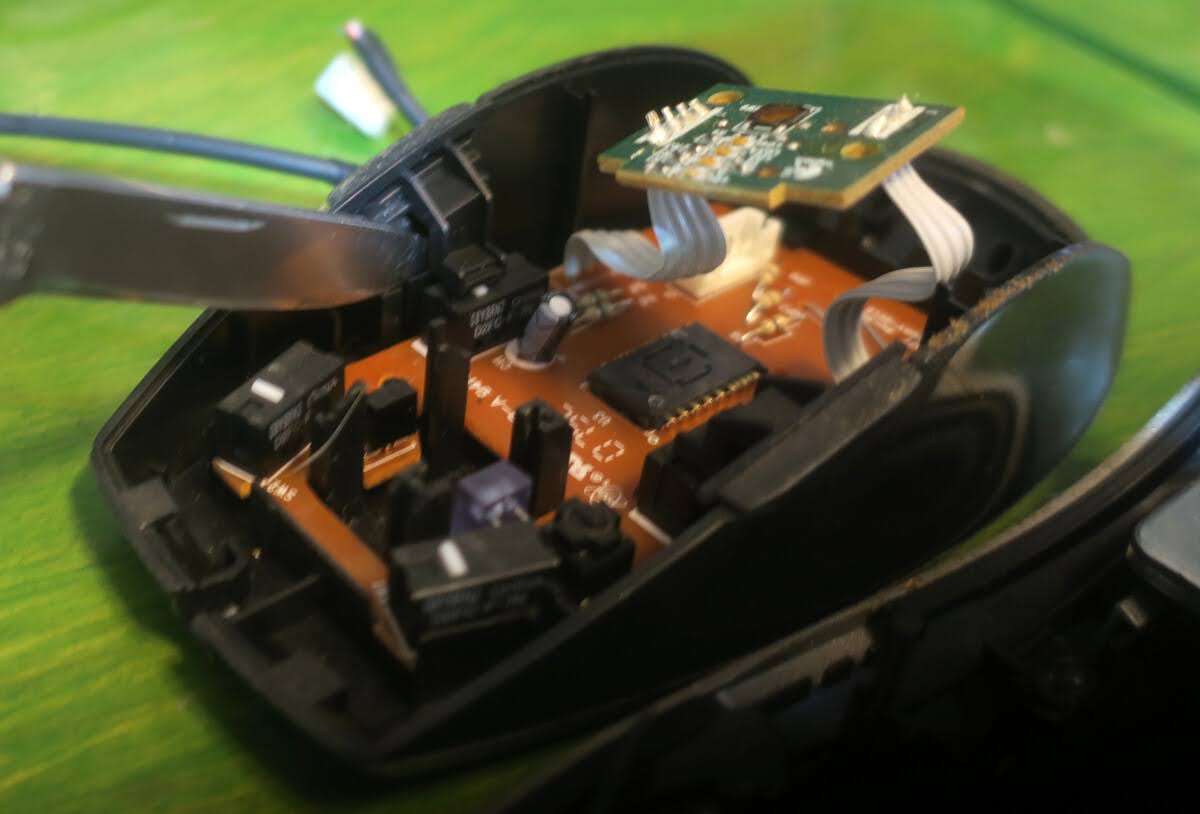
In the photo below you can see the big air gaps around the laser sensor, and the big lens tray that collects material that falls on it and prevents cleaning from the outside.

Scroll wheel:
I would call this a second generation scroll wheel: it has a stub that goes into a mechanism that sends pulses when scrolled and supplies the rotating resistance. You can pull the wheel out of the mechanism for cleaning. There is a spring that provides the resistance for the scroll wheel click mechanism that is on the other end of the shaft, this catches on two small towers over the scroll wheel click switch. (I thought it was supposed to slide between the towers, but assembled this way it becomes obvious that is not correct).
Mouse click switches:
In the mouse that I paid attention to, these are Omron D2FC switches. They are through hole, so if double click issues showed up, they could be replaced. You can also attempt to repair the switch mechanism. The tops of the switches pop off by gently prying the small retention tabs of each side of the switch (be careful not to loose the small white actuator inside). I cleaned the contacts but did not attempt any spring bending. I measured the switching voltage, it's 5V, so I think they will go for a very long time.
Weights:
I removed the weights from the mice. They are held in by a single screw. At some point, a mouse is too light for me, but my preferences have moved away from heavy input devices over time.

Design notes:
To my surprise, these were made by Logitech for Dell. While I think they are somewhat unique, they have a BOM and design. (single sided PCB with through hole parts and very limited complexity) that is typical for a cheap 2000's mouse, but the core microcontroller and laser sensor are on par with some nicer mice in the era.

The mouse microcontroller is a Cypress CY7C64823 (Datasheet: https://www.infineon.com/dgdl/Infineon-CY7C63310_CY7C638xx_enCoRe_II_Low_Speed_USB_Peripheral_Controller-DataSheet-v21_00-EN.pdf?fileId=8ac78c8c7d0d8da4017d0ecc994f46c9). Nothing fancy, but it's interesting to see from the datasheet that Cypress has software that lets you basically build the mouse/input device characteristics from their library. I wildly guess it's running between 12 and 24 mhz. It can also support both low speed USB and full speed USB-2. It has 256 bytes of memory and 8 kilobytes of program storage (flash). This is a 24 pin surface mount device that I think could run directly from the ~5V USB bus with little power conditioning. I regret not following the traces, I wonder if it is using all the GPIOs? 8 button functions (Left, right, forward, back, scroll up, scroll down, scroll button, resolution), the USB bus (2 pins), and an SPI connection to the laser sensor make that seem unlikely.
The optical sensor is an Avago ADNS-7550 (Datasheet https://datasheetspdf.com/pdf-file/913766/AVAGO/ADNS-7550/1) Notably the sensor features the same 400/800/1200/1600 DPI that matches the dell and logitech literature, as well as a 2000 DPI mode that isn't used by the mouse. I didn't track traces, but from the spec sheet, it looks like a minimum implimentation is an SPI connection to the micro controller, along with an interrupt line from the mouse to tell the controller there is activity, and then connections to 5V power from the USB bus.
The spec sheet has some interesting charts showing how the sensor acts on different surfaces.
Mine were made around 2008 or 2009 according to the date code.
It looks like, between the two mice, there were several revisions to the circuit board over time based on the revision numbers printed on the silk screen.