The initial attempt at troubleshooting focused on the TBI unit and fuel system. The next likely point of failure was the coils/DIS (Digital Ignition System [module]), and crank sensor. On the GM 700 Series TBI system, these components are directly connected together into a single unit.
There's a decent write up on the system on the Megasquirt Page. Between that page and the Haynes manual, I've been able to construct a diagram that looks about right, but I haven't really tried to track down every single pin on the DIS (I think there's a separate tachometer output, and I neglected fuses, coils, and the fuel pump circuit.

While I am still a bit unclear on the specifics of the operation, the inductive pickup crankshaft sensor is directly connected to the DIS, which then sends pulses to the ECU (Purple/White Wire). The ECU then uses a lookup table determine when to fire the spark plugs and sends a pulse back to the DIS to trigger a spark (White Wire). The system is a 2 coil, waste spark system, so each cylinder ends up sparking twice per cycle.
The ECU also uses the pulses from the crank sensor to time the fuel injector by grounding the injector (Dk. Blue wire). No injector pulses mean no fuel, which would lead to the condition observed that the car didn't smell very gassy when it wasn't starting, and it wasn't stumbling or coughing. This could be caused by the DIS not getting a signal from the crank sensor, or by the DIS going on the fritz and not sending a signal, or by a wiring failure.
Also of note, during startup, the DIS completely controls spark, and the ECU grounds EST bypass. Once the engine is running, the ECU sets ECU bypass to +5V, and sends an EST signal.
Checking the coil/DIS/crank module is not an easy task on this car. GM thought it was so reliable (ok, lets face it, 28 years is a good haul) that it put it in between the engine and the fire wall, above the rack and frame member, and below the TBI and intake manifold, and then obscured every access route with cables and tubing. It's a good job for someone with a good spacial sense and skinny arms.
To check the ignition module, a lot of stuff has to come off the top of the engine.

I bought a fuel line disconnect tool kit from amazon. Annoyingly, it turns out there really aren't that many different types of fuel lines, the kit comes with essentially 4-5 different versions of the same tool. For this engine, only 3/8 and 5/16 tools are needed.

I left a rag to soak up the fuel that dribbled out of the fuel lines.

Air filter off, and throttle cable and crank held out of the way with a bungie cord.

There are 4 nut holding the DIS on to the this alumnium tray, with captive bolts. The tray isn't very thick, so the bolts will start spinning as the nuts are loosened, There are 3 bolts holding the whole assembly to the block. The small two pin connector on the bottom of the tray is from the crank position sensor.
After removing the 3 big bolts, I tried to pull the sensor out in one piece. Instead, it handily snapped in two. Drat.

After many hours of fiddling with different tools, I was able to drill the back of the inductive pickup with small cordless drill and insert a screw, which allowed me to pull the crank sensor out of the block. I nearly gave up and dropped the oil pan to push the sensor out from the inside. The sensor body was heavily cracked and it's magnetic character had accumulated a fine coating of metal shavings.

Cleaned up, the cracks are a lot more apparent. This looks like the point of failure!

The inductive pickup end. Very magnetic still.

I then went about reassembling the DIS system with new parts. I bought a Standard Motor Products LX344 DIS and PC3 crank sensor. The sales literature claims the LX344 is an improvement over the Delphi/GM module, though I can't quite imagine how it could improve.
The crank position sensor bolted to the aluminum heat spreader. The socket gets a thick bead of PTFE grease.

Comparison of the Delphi (top) and Standard Motor Products DIS. Outwardly, they're almost identical. I assume the Delphi didn't come from he factory with spider parts.

The LX344 came with an extremely useful troubleshooting guide! The guide explained that the DIS I was about to replace was probably not faulty, and that the ECU, the coil pack, and the crank sensor were likely culprits! To check the ECU, it suggested monitoring the RPM line from the DIS and the EST return for pulses. To check the coils, it suggest checking for spark by direct test or switching the coils around. It suggests checking the crank sensor resistance and for damage to it's housing. I guess that's what I found.
I decided to not replace the original GM coil packs, although when I was ordering the DIS and sensor, they were tempting given the effort involved. They looked ok and ignition hasn't been an issue.


The reassembled DIS/coil module. DON'T DO THIS! It won't fit into the car unless you take the crank sensor off first. The crank sensor has to be attached once the unit is under the intake manifold.

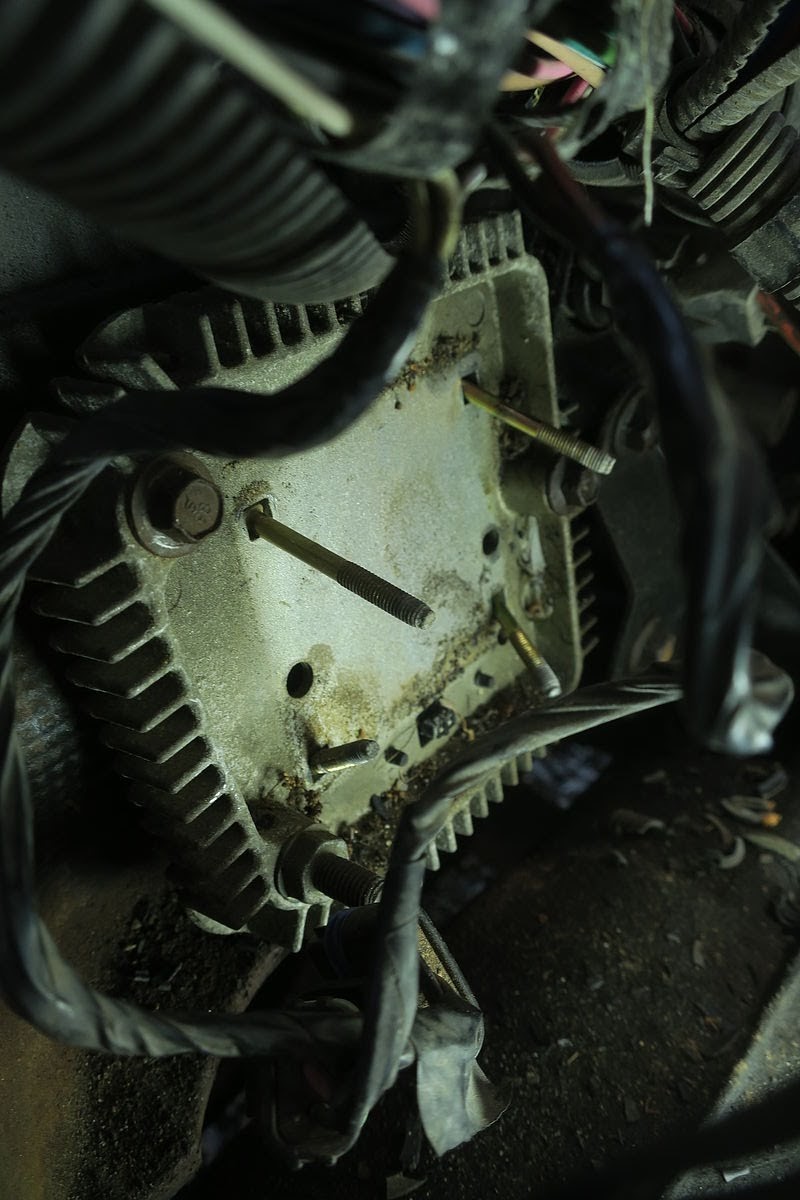
Here's what the DIS/crank sensor hole looks like through the top of the intake. Basically one stands on hands and knees over the engine and reaches down with the right hand to wrench. Fortunately, the space under the intake is quite voluminous, and it's possible to fit a work light and other things and there's room.

Closeup of the crank sensor hole. I put a thick gob of grease there, in the hopes if someone ever has to pull the sensor again, it will just slide out.

I took the chance to re-route the spark plug cables as GM intended.

After the replacement, which took all weekend thanks to the broken crank sensor, the car started right up and has not failed since.